Flushing the catheter
Depending on the viscocity of the pleural effusion or ascites and the catheter dwell time, flushing the catheter could become necessary to avoid clotting and ensure smooth, problem-free draining. Irrigation is performed by you as the clinician under sterile conditions.
Flushing the catheter
Depending on the viscocity of the pleural effusion or ascites and the catheter dwell time, flushing the catheter could become necessary to avoid clotting and ensure smooth, problem-free draining. Irrigation is performed by you as the clinician under sterile conditions.
Information about flushing the catheter
In case a normal effusion drainage is impossible;
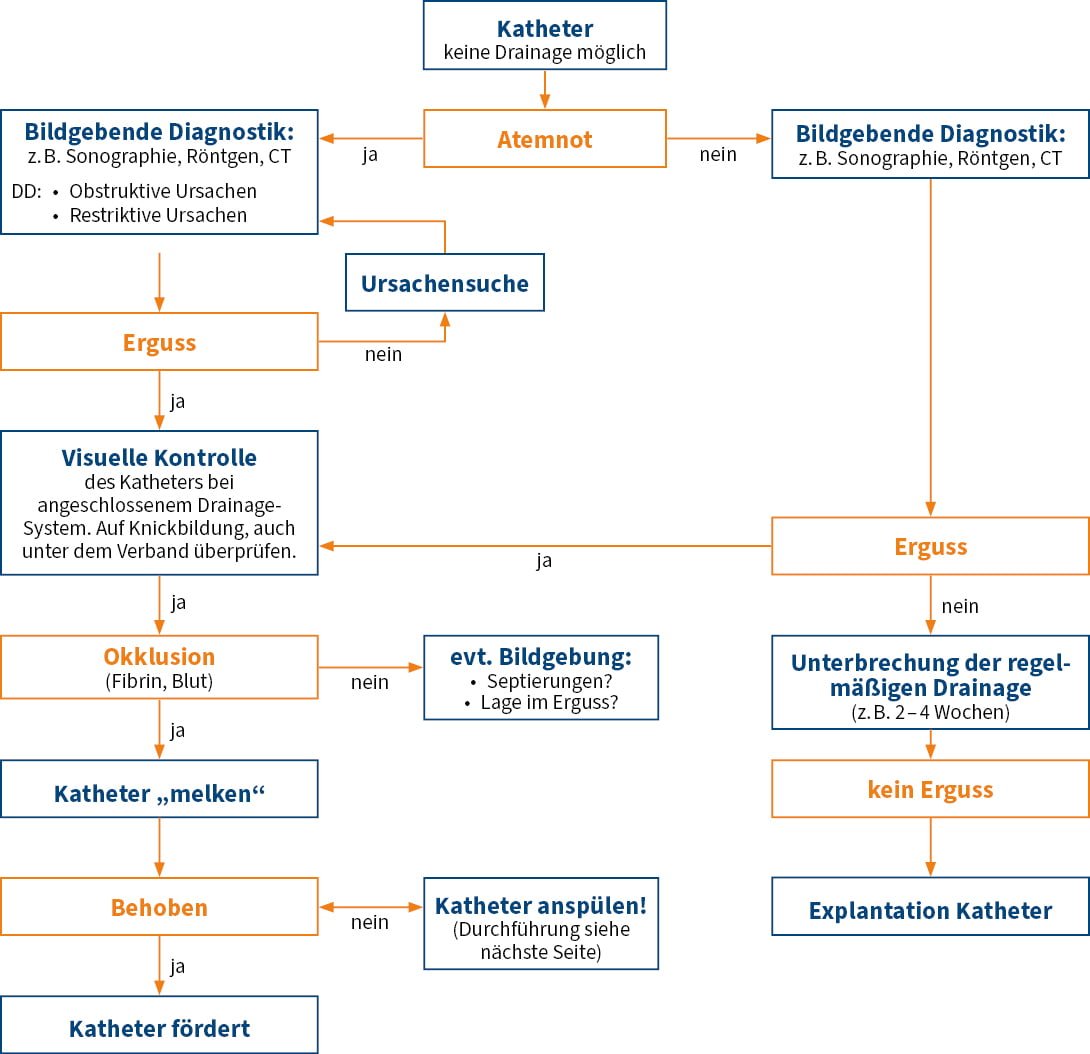
Required materials
- PleurX™ / PeritX™ irrigation tubing (Art. No. 50-7245A)
- PleurX™ / PeritX™ Protective Cap (Art. No. 50-7235A)
- 3-way cock
- Syringe >20 ml
- NaCl 0.9 %
- Alcohol disinfectant
How to change the dressing

1 | Connect the 3-way stopcock to the PleurX™ irrigation tube and deaerate using a syringe filled with NaCl 0.9 %.
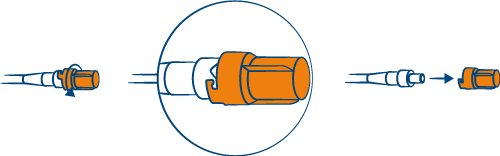
2 | Loosen protective cap by turning, remove and dispose of.

3 | Disinfect the safety valve.

4 | Connect the rinsing hose to the safety valve and rinse with NaCl 0.9 %. Volume of irrigation tube up to the 1st drainage hole of the catheter approx. 7 ml. After that, perform drainage.

5 | Disconnect all connected systems again.
6 | Disinfect the safety valve.
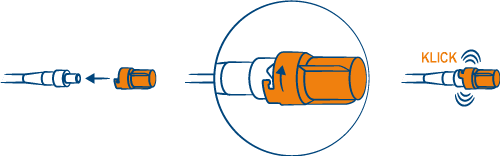
7 | Attach new protective cap.